The blender is an alcohol based marker without ink, which means that it doesn’t contain any color, why would you need a transparent marker ?
It is the most useful marker, because it is needed to achieve a variety of technics : Shading, blending, ligthening and retouching. It is used also as a “brush” with Mix’It, a blending palette for alcohol based markers (more explanations here).
1- Shading
When you applied the blender on a color before it dries, you can lighten a dark color for shading effects and reflection. For back ground work, it’s better to apply Blender on a large area before any color, in order to obtain an homogenous effect.
Then, on the area soaked with blender, apply the colors : The result will be akin to water colours if you use light colors for example.
Then by successive layering, you can darken and contrast the area as neede do. If you need to leave area blanks for lighting effects, applying the blender on the edges soften the demarcation lines.
2 – Blending / Mixing
To overlay two colors when the first is already dry and prevent that we see streaks between two colors, you can apply the Blender before applying the second color to soften the result.
The best solution is still to put the Blender before the first color : They will fuse better easily and the mix will be more homogeneous.
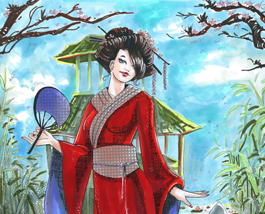
The blender is also used stroes of markers in finishing, for example for shade effect in fashion design.
3- Lightening
To bring light and lightening a detail in a small area, a reflection in the eye for example, simply use the Blender to create a brighter halo.
4- Retouching
Blender is not a white out and is complementary to an opaque white marker, but when a color has slightly overlapped the line for example when coloring a stamped image, it’s possible depending of the type of paper to push back the color toward the line and thus fix the overlap error. You must push the color by step and multiple times until the desired result.


One comment
C’est bien ça 🙂 je vais pouvoir diriger les personnes qui me demandent comment se servir du blender vers cet article ^^
By submitting a comment you grant Graph'it Marker a perpetual license to reproduce your words and name/web site in attribution. Inappropriate and irrelevant comments will be removed at an admin’s discretion. Your email is used for verification purposes only, it will never be shared.