
Hello !
Logical continuation of tutorial N°2“How to make gradients at Graph’it Markers“, today I’m going to explain how to draw metal with the Graph’it Markers.
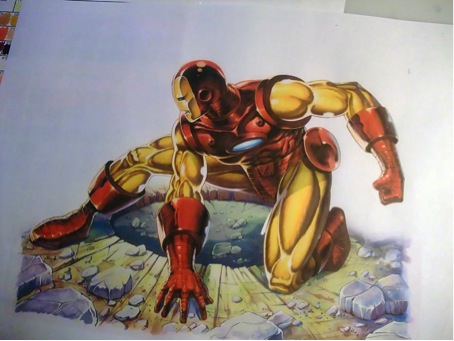
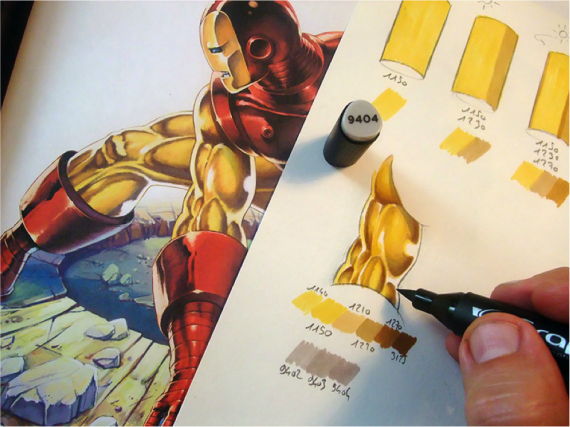
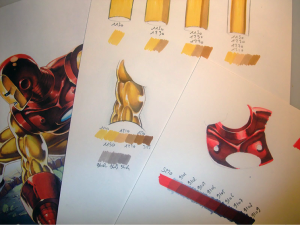
Let’s take an example from an illustration of Iron Man that I drew on a tablet with the Painter 9.5 software.
With this drawing, I will show you that you can have almost the same look as on a tablet, with a traditional colorization with markers.
Let’s start with the B.A.BA
I will start by drawing 4 tubes with different lighting, so that you can see that it’s all about lighting, depending on the texture you want to draw.
The idea here is not to learn to draw, but to see different effects with a fairly simple result.
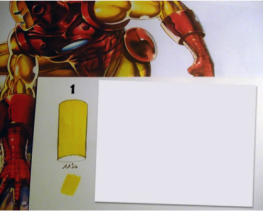
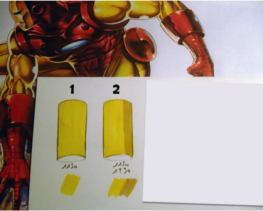
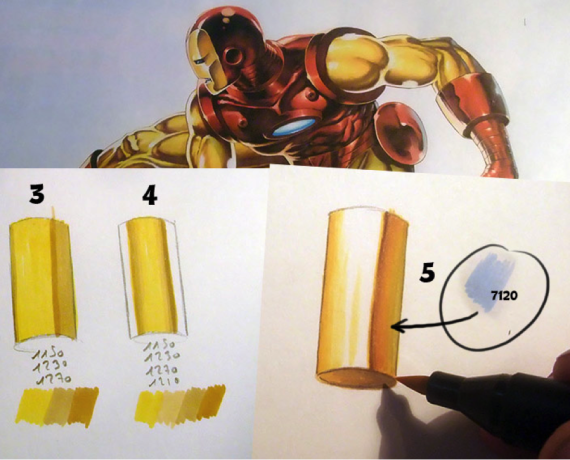
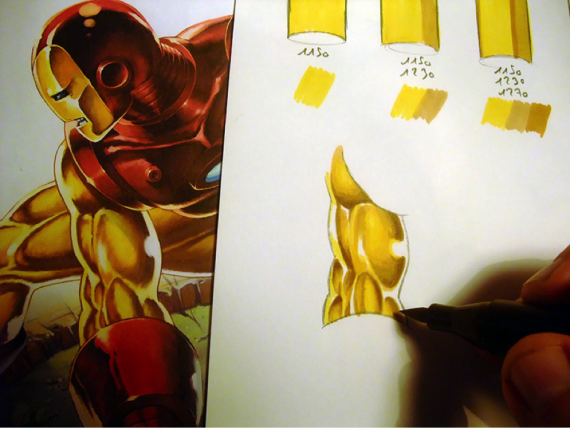
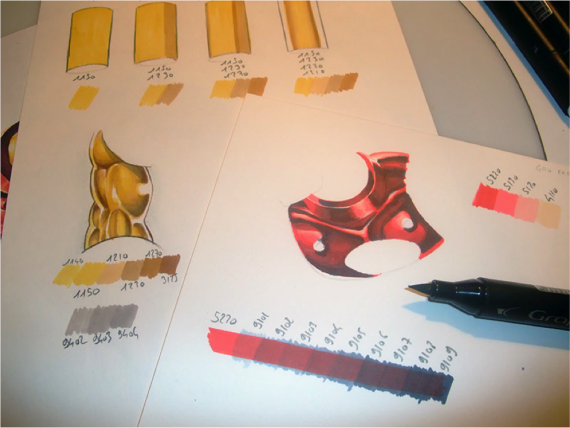
Tube 1/ I start on a yellow base N°1150, the golden color of Iron Man. Our tube is completely neutral.
Tube 2/ On this yellow I add a shadow with the N°1230, there is a little more volume, but the material is matt and the lighting is on the left side.
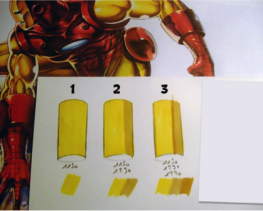

Tube 3/ Here I add a darker connection in the shade, which will start to give it a slightly smoother appearance. It is this darker connection that accentuates the “smooth” effect with the colour N°1270.
Tube 4/ On tube N°4 the light is on the back and slides around the tube. Adding a white color to the edges accentuates this effect, and makes the tube metallic. Here, I used the colours N°1150, 1210, 1230, 1270.
It is made in this way: the base 1150 + 1230 first and the felt N° 1270 to mark the dark shadow. Then, the felt N°1210 is used to make the color gradation between the dark 1230, 1270 and the basic 1150, but you can accentuate even more if you wish….
Here is a more “finished” tube.
A little tip: I added a blue color in the right shade with the felt N°7120 to give a green side, (blue + yellow = green), to give even more volume.
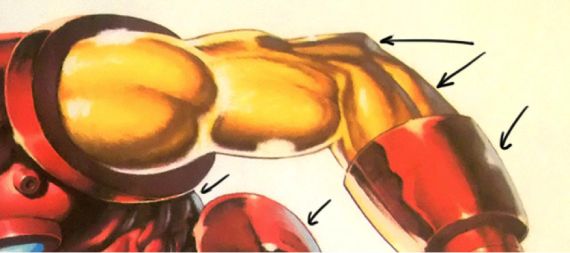
I marked with arrows the areas highlighted by another color to give more volume and have the desired metallic effect.
From theory to practice:)
Let’s do a test on a piece of arm…. We start with the basic yellow N°1150

Then, as for the tubes, we proceed according to the shape of the volumes to be drawn. Which will give us this.
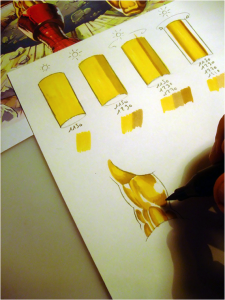
We’re going gradually….
To finish the arm, I place the shadows in the same way as in tutorial N°1.
For shading I often use the range of felts N°9400, in which case I used felts N°9402, 9403 and 9404, but you can use other colours for shading. We will come back to this later.
The red chest
Let’s now move on to a red part, in order to explain how to multiply the 176 basic colors of the Graph’it Markers.
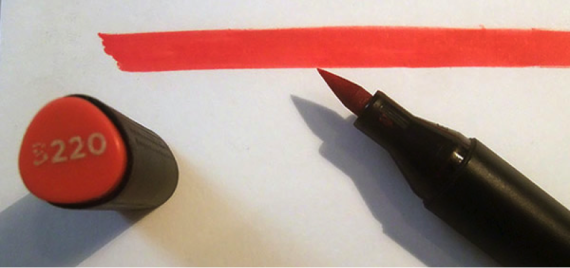
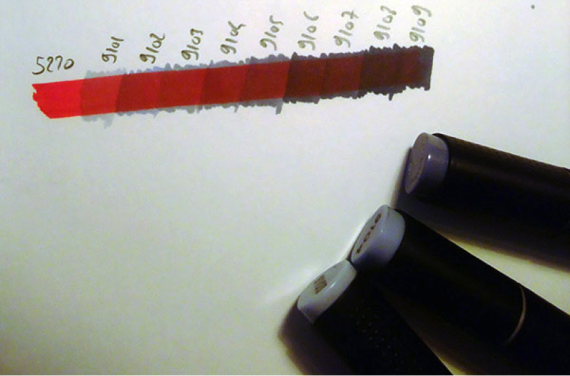
I use as basic red N°5220.
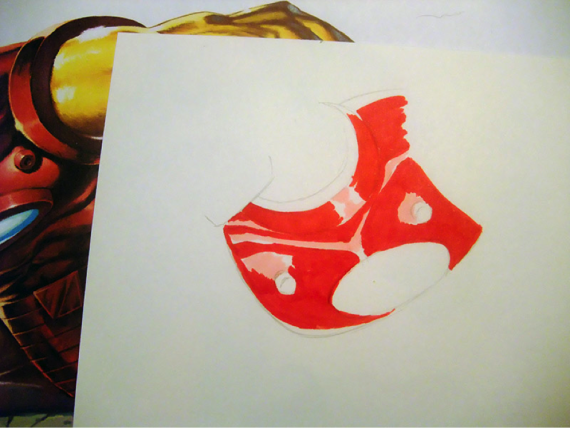
But now, we realize very well that if we start with this color range, we will not have all the necessary shades of red! So what can we do? Easy, I’ll show you…
I start by drawing a bar with marker N°5220
Then I simply colorize with the 9400 range of felts (which you can find in this set for example with other grays here).
This gives us 10 variations of the felt N°5220🙂 we have a range of 11 colors just with the red 5220!
I told you it’s easy! And we can do it with any color!
Let’s take as a second example the marker N°7145.…
As you can see, this multiplies the basic colors, so don’t hesitate to superimpose your colors and do a lot of compatibility tests between them.
So let’s get back to our chest piece.
For some reflections I also used felt pens N°5130, 5120 and a layer of felt N°4110 on top to break the pink colour 5130 a little.
See you soon for another tutorial! And don’t hesitate to ask your questions.
Philippe
—
To learn more about Philippe Dessoly and to find all his creations, here is his site and his Facebook page:
www.facebook.com/philippe.dessoly.7
http://www.golgoth71arts.com/
—
Si ce tuto vous a plu, retrouvez également 2 autres turoriels :
Tutoriel technique 1 : Comment coloriser la peau – « style comics » – marqueurs à alcool
Tutoriel technique 2 : Comment réaliser des dégradés aux Graph’it Markers
3 comments
Super bien expliqué et du coup je me rends compte qu’il y a des choses que je fais naturellement 🙂
MERCI POUR LE TUTO
merci à toi, de ses précieux conseils.
By submitting a comment you grant Graph'it Marker a perpetual license to reproduce your words and name/web site in attribution. Inappropriate and irrelevant comments will be removed at an admin’s discretion. Your email is used for verification purposes only, it will never be shared.